Optimising for colour underwater!
Water absorbs the red and yellow colours of the light spectrum, leaving underwater shots with a blue and green colour cast. How do we correct this problem?
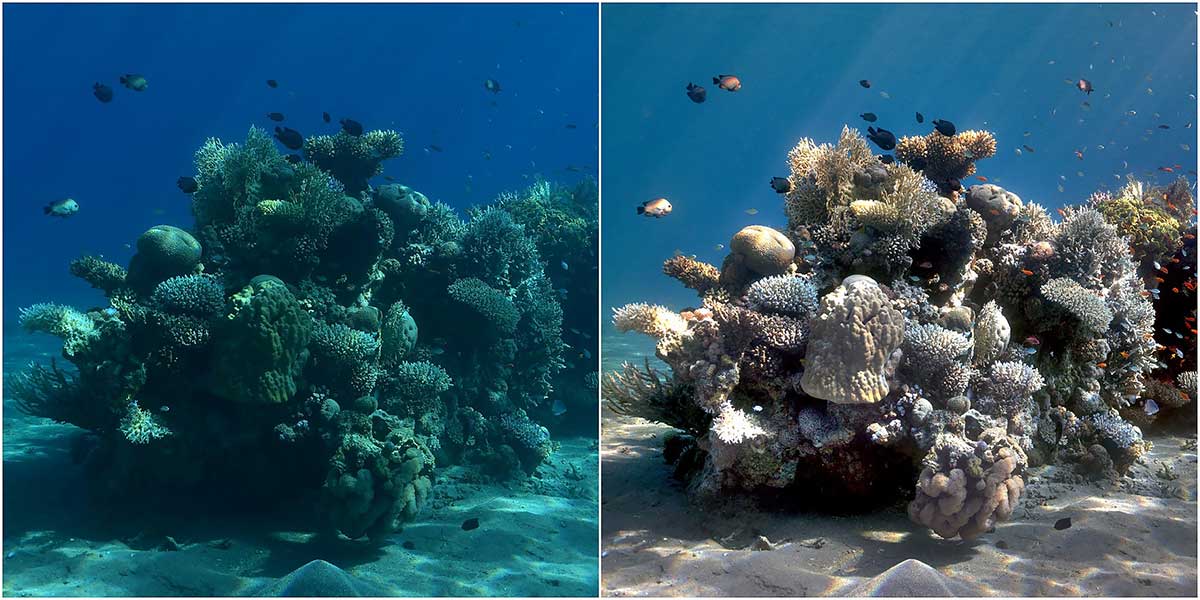
As every diver knows, the underwater world is a tremendously rich and colourful environment but when you look at the pictures you bring back, they might all look dull and blue.
The human brain has an amazing capability for compensating for varying lighting situations and cameras can do this as well, up to a certain degree, with what we call 'Automatic White Balance'. We'll get to that later.
Algorithms have been developed too, which automatically adjust the colours of an underwater photo or video to compensate for the blue cast. Image 1 shows you the difference made by a program called Sea-thru.
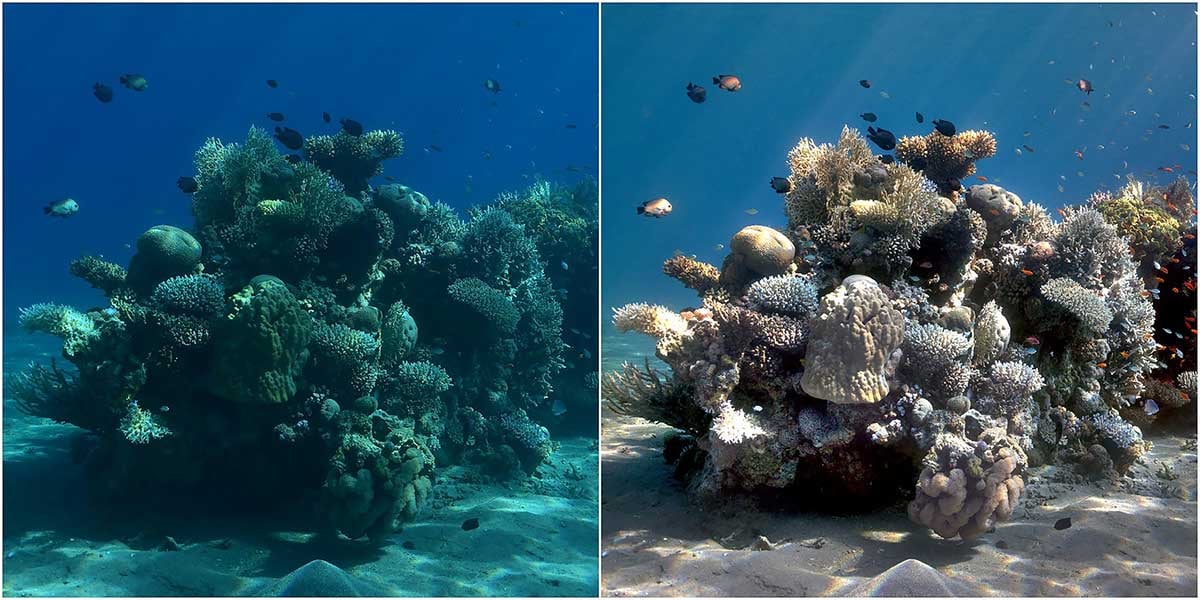
But unfortunately this algorithm is not currently commercially available. We can only work with image editing programs such as Photoshop, and try to improve the colour balance by boosting the red and yellow tones while reducing blue and green hues.
The easiest way to get around the problem is to use a flash, strobes, or permanent lights if you shoot video. Even then, further distant objects will have a bluish tint, but you can expect nearly perfect colour with closeup shots.
White Balance and RAW files
Chances are your camera can be set to output RAW files. Switching from JPEG to RAW files allows you to get maximum quality with the main drawback that you need to process those files on a computer. But if you value quality, the benefits outweigh the shortcomings.
Camera RAW files will give you an increased dynamic range and allow you to recover details in blown-out highlights. The main appeal of RAW files for the underwater photographer is the flexibility they give you for colour adjustment.
Most cameras allow you to set the ‘White Balance’, eg to Auto, Daylight, Tungsten, Flash, Cloudy, etc. Typically, underwater photographers set their camera to Auto or Shade for best results (unless you use a flash, then you select the Flash setting).
However, if you choose RAW file output, then your White Balance (WB) camera settings are irrelevant, because you can tweak the optimum WB in post-processing.
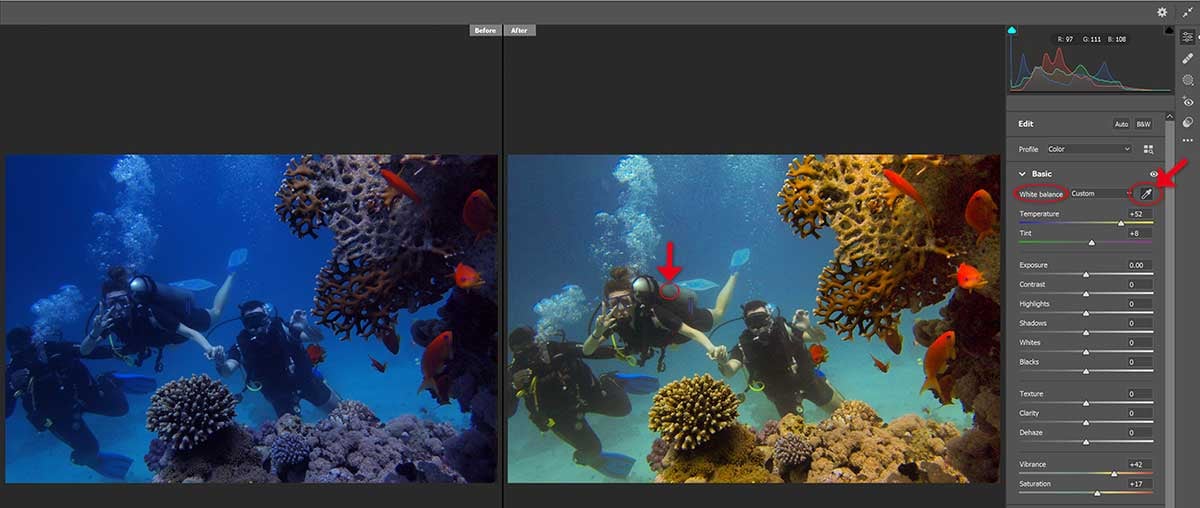
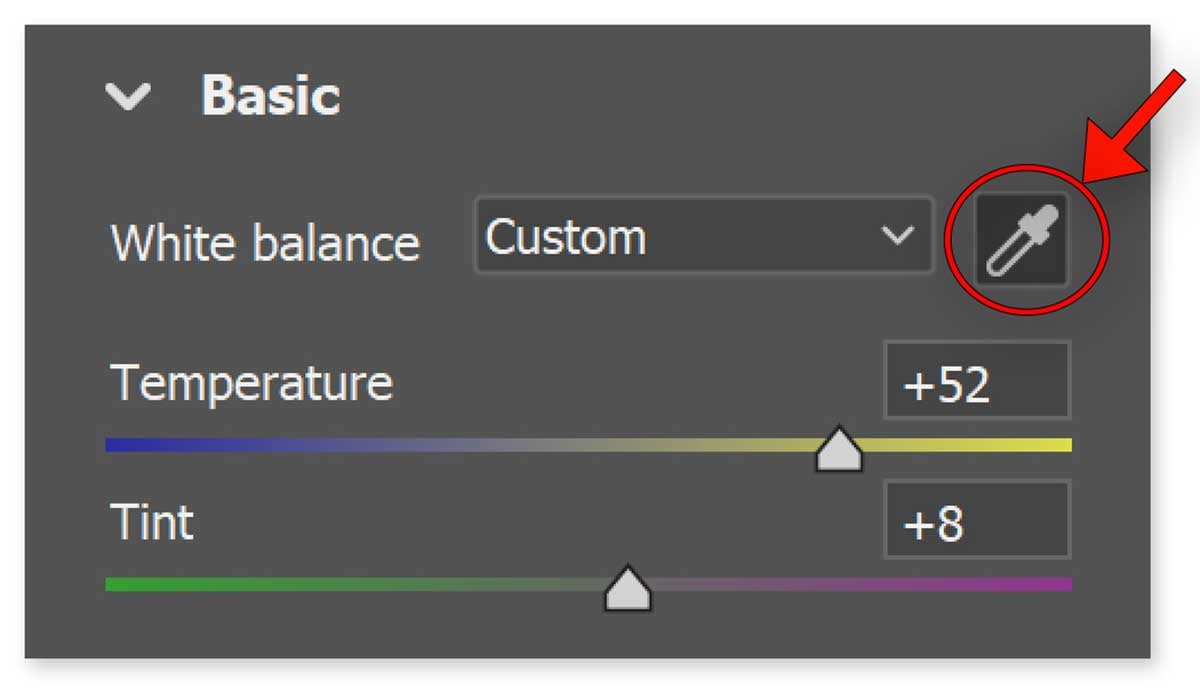
The image above shows an underwater shot with the typical strong blue cast on the left. The image editor in this example was Adobe’s Camera Raw, but the popular Adobe Lightroom will give an almost identical interface, and there are lots of other editing programs allowing you to adjust the WB.On the right of your image you’ll find two sliders under the White Balance heading: Temperature and Tint. And there you’ll find the White Balance tool (circled in red, Image 3).
This is a kind of eyedropper tool. The idea is to click in a part of your image which you expect to have a neutral grey colour. In Image 2 the scuba tank of the diver nearest to the camera is used as a neutral grey object (circled in red). Make sure that the point on which you click is not a highlight, but the program will let you know if the chosen area is too bright and not suitable.
Once you click on an area, the algorithm will remove any unwanted colour cast and render this particular area grey. At the same time, the colour correction will be applied to the rest of the image and you will immediately notice the overall improvement.
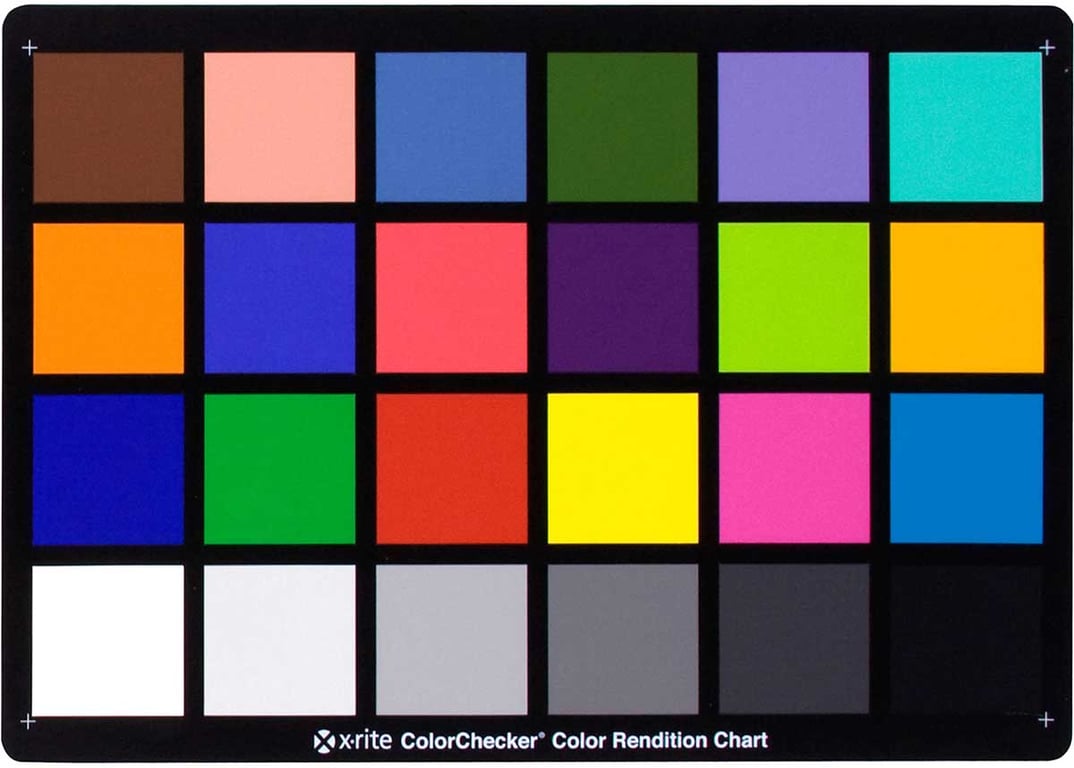
Needless to say, finding the right neutral point is critical to the process and this will differ from image to image. If a scuba tank of a fellow diver is in view, this will be a good starting point, or it might be a weight belt, or your own fins. White corals, or even the white sand at the bottom can be an area of choice. Make sure that the chosen point is not too far away from the camera, otherwise the program will over-correct and leave you with an overall red cast. Ideally, you can take a colour chart along with you on your dive (Image 4), but few divers will want to add anything more to their gear!
As a second step you might want to fine-tune the colours with the the two sliders (Image 3).
The Temperature slider adjusts the colour temperature from cooler to warmer, and the Tint settings controls the colours on the magenta to green scale. There are no fixed rules, simply adjust the two sliders until you achieve the most satisfactory look.
Colour correction with JPEG files
If you work with JPEG files, you won’t have the flexibility of the raw image data, and your options are more limited. Remember you cannot simply add red to your underwater shots but need to shift the colour balance, for example from cyan to red. This is easy to visualise with a so-called colour wheel which wraps the visible light spectrum around a circle (Image 5).
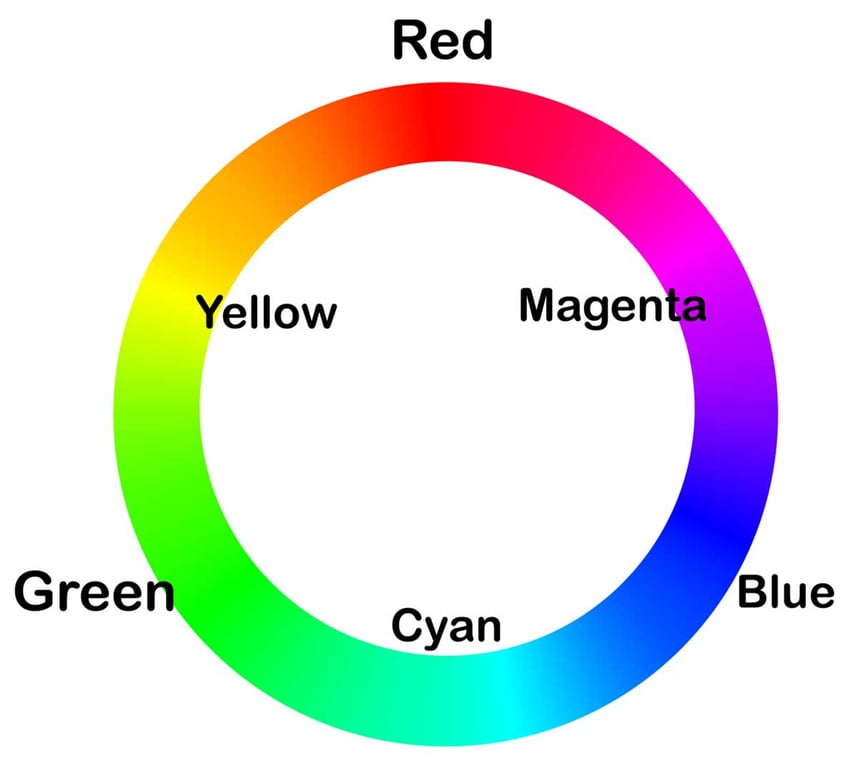
Red, green and blue (RGB) are the primary additive colours, because adding them up gives us white. In between we find the primary subtractive colours: cyan, magenta and yellow (CMY). These are the colours we use for printing, and they add up to black.
Every image editing program gives you various tools to shift the colour balance in a photo to eliminate, or at least minimise, the blue colour cast in your underwater shots. The most common tool is the Colour Balance tool (Image 6). It comes with three sliders for adjusting the balance between the primary colours, and this can be done separately for shadows, midtones and highlights.

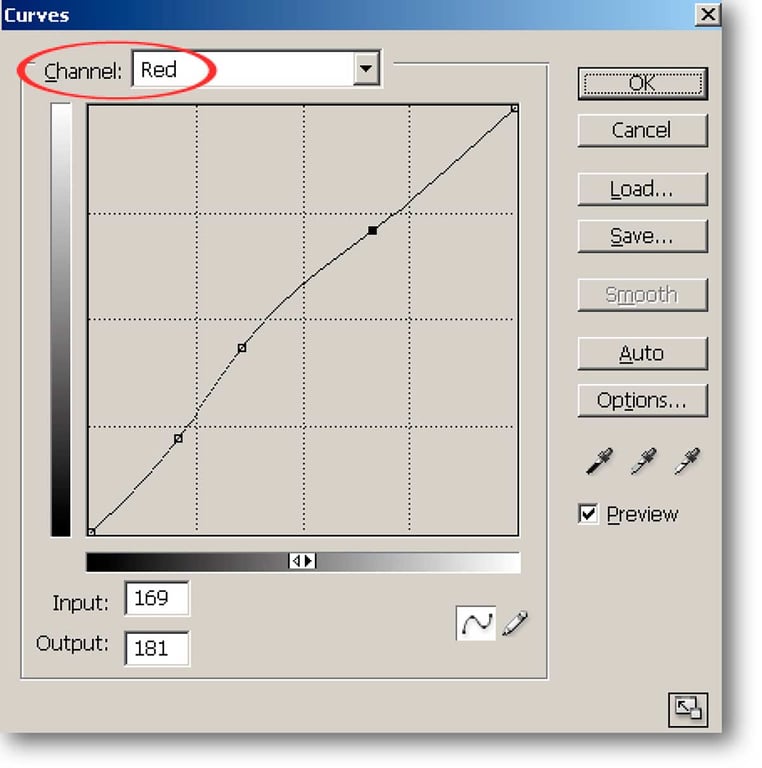
The Curves interface of your image editing program gives you even more control (Image 7). It allows you to make adjustments to the combined RGB channels as well as to individual colour channels.
In the example shown I selected the red channel, and by pulling the curve up, we increase the amount of red in our image (and reduce cyan). You can use only one point to pull the curve up or down, or you can control the colour balance in the highlights (upper part of the curve) separately to the shadow areas (lower part of the curve).
In summary
Bringing the colourful underwater world back to life in your photography can be challenging. The easiest and most effective option is to use a flash or some other artificial light, and to get as close as possible to your subject.
Switching your camera to RAW files will give you the best options for reducing the unwanted blue cast. However, you need to remember that a certain amount of water between you and your subject will eventually eliminate all red tones and no amount of Photoshop magic will bring them back!
In future, we might see programs with a sophisticated algorithm, like Sea-thru, which will allow us to easily restore underwater colours, making colourful underwater photography in natural light possible.


